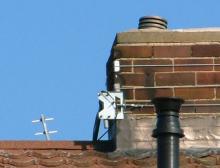
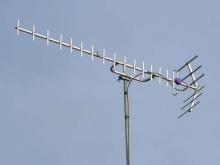
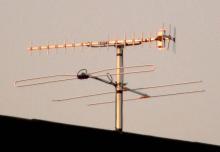
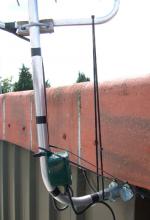
The array was a contract-type 10 element group C/D - not much there to catch the wind – but it was at the top of an eight foot length of 1 inch diameter aluminium mast, in an exposed coastal location. Presumably the tyro over-tightened the top ‘U’ bolt and crushed the thin tube wall, but in any case this grade of tube should only be used in short lengths.
Rogues Gallery
This is a loft bracket that someone has used outdoors, on the roof of a shop in a retail park. It was supporting an 18 element Group A contract quality aerial on a stand-off mast four feet high. The bracket has been fixed to very thin flexible steel cladding with No 6 self-tap screws. For some reason sealant has been applied around the bracket. Maybe the installer had faith in the adhesive properties of the silicone!
This is an attempt by someone to connect a CT167 cable into a Labgear tap-off unit. Normal people do this by fitting a crimp ‘f’ plug on the cable. The hard of thinking evidently have other methods, and this man has decided to do it with a soldering iron. What a masochist! The mind boggles!
TV signals are polarised. The elements of the aerial should match the polarisation. If the transmitter is listed as ‘Vertical’ your aerial rods should be vertical, and ditto for horizontal. Maybe this installer wanted both at once, because he’s got the dipole and directors vertical and the reflector horizontal. The transmitter was vertically polarised, so the horizontal reflector wouldn’t do its job. The aerial will have lost much of its directional properties and gain (sensitivity).
This customer had a large distribution system fitted by us some time previously. The premises are about 100 miles away from here, so when they suddenly needed a VHF FM aerial to feed into someone’s office I suggested that they find a local installer. Although they would have paid up cheerfully it seemed such a waste of money for me to drive that far when a local man could do just as good a job. Of course, I was wrong about the last bit. The dipole and director are in each other’s place, the aerial is mounted at right angles to the transmitter direction, and isn’t it upside down so water will get into the junction box?
Yes, I know one of the reflectors on my TC18C/D is bent. They have big birds round there. . .
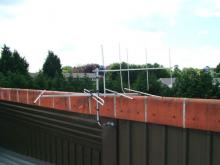
We come now to a series of photographs that show aerial botchery as an art form! This is a true delight, a masterpiece of the cowboy aerial rigger’s profession! The next few pictures were taken on the roof of a shop in a retail park. The red surface is the edge of the tiled roof, and the brown below is it the very thin aluminium cladding that they use on these buildings. In this first photograph the mast is supporting two arrays. The original idea, I imagine, was to fix the lot to the aluminium using the little loft mount and a few self-tap screws, but this evidently didn’t satisfy our perfectionist installer. Not totally happy with the structural integrity of his creation (in other words, he was scared it might fall down before he got paid) he has made daisy chains from cable ties and, well, used them as guy ropes, sort of . . .
Another classic from the same hand. Leaving aside the ludicrous fixing, look closely at the DAB aerial. The folded dipole is where the reflector should be and vice-versa. The end of the reflector has been bent away from the wall. The VHF FM aerial is touching the masonry, and you’ll have to take my word for it that the best DAB and VHF FM transmitter for the area was to the photographer’s left!
This is another shot of the installation in the previous photograph. Now we can see what’s holding the whole thing up. A daisy chain of cable ties holds the VHF FM dipole in place. I wish I’d thought of this 30 years ago. I could have saved a fortune in wall brackets.
This was obviously a belt and braces man. Despite the superb quality of the fixings shown on the previous two shots, he’s added a third support – another daisy chain, this time looped under the tiles.
Encore, encore, I hear you shout! Finally then, here’s another shot of the first installation, showing the mast poked up between the elements and the slovenly cable fixing.
You shouldn’t drill from the inside of the house because you’ll damage the face of a brick, but if you really must, at least have a look at the wall outside before you start! The joke here was that this was the new home of the boss of an electrical contracting firm, and the culprit was one of his foremen! The boss is a red-faced man who shouts a lot, so I told him about it by email.
This is a double chimney bracket, with two lashing wires around the chimney. Look at the bottom wire.
This is a cheap unscreened splitter, intended for ordinary downlead cable. Our man has managed to force CT167 trunk cable into it. The splitter was on its back on a flat roof. The lid was on, but there was no seal on the cable entries. Not surprisingly the cables were full of water. Each output served about thirty flats. Note the long pieces of exposed inner, a sure cause of unwanted radiation and pick-up.
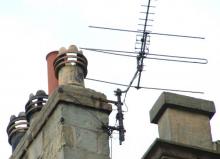
I don’t suppose the Victorian craftsmen who made this cast iron sunflower could have imagined this 21st century adornment. Apart from anything else the aerials are too close together. One aerial and a splitter would probably have worked better.
I found this, and many other like it, above the ceilings of a smart residential complex. The cable is CT167 and the white object is a cheapo plastic ‘Y’ splitter. In order to connect the cable into the ‘Y’ splitter the installer has forced 11 mm CT167 into the unwilling bodies of various 6 or 7mm ‘f’ plugs. He has then used ‘f’ to Belling adaptors. The sockets on the splitter couldn’t take the strain of the stiff CT167 so they have broken. The blue and yellow tape hides the gore when a thick cable violates a small plug. Note that some of the crimp type ‘f’ plugs have broken in two under the strain. The shiny box is a four-outlet tap-off unit of Italian origin.
What a cheek! I’m surprised the owner allowed his weather vane to be abused in this way.
This is pathetic, isn’t it? Twist the inners together, make the braids into pigtails and twist them together, wrap tape round it and the job’s done. Note the kink at the bottom of the loop. This was on the downlead of an aerial feeding a 48-outlet system.
From the same job as the previous shot, this shows how not to feed three flats from one cable. This was on a flat roof, and the cables were full of water.
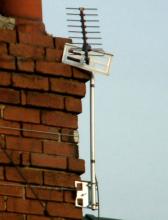
What a pity the installer didn’t have a cranked mast in the van. The mast is bent slightly and the reflector is pushed out of place by the chimney. This sort of botchery is typical of the don't-give-a damn cowboys who unfortunately infest this trade.
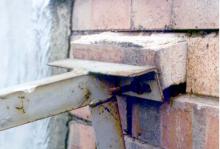
I wish I could reveal the identity of the prestigious premises where I took this snap (no, it isn’t on my customer list). This is one of a pair of brackets supporting a 20ft mast. The culprit was the in-house technician. Never fix to a wall in this condition. Merely drilling into a brick will reveal the poor state of the mortar, because the brick will vibrate and come loose. Always spread the load between two or more bricks.